
Do you want to renew the appearance of your appliances? If they still work perfectly, but have become yellowed with the passage of time, this tutorial will show you how to paint a fridge with our blackboard spray paint and you will see how quickly you can revitalise
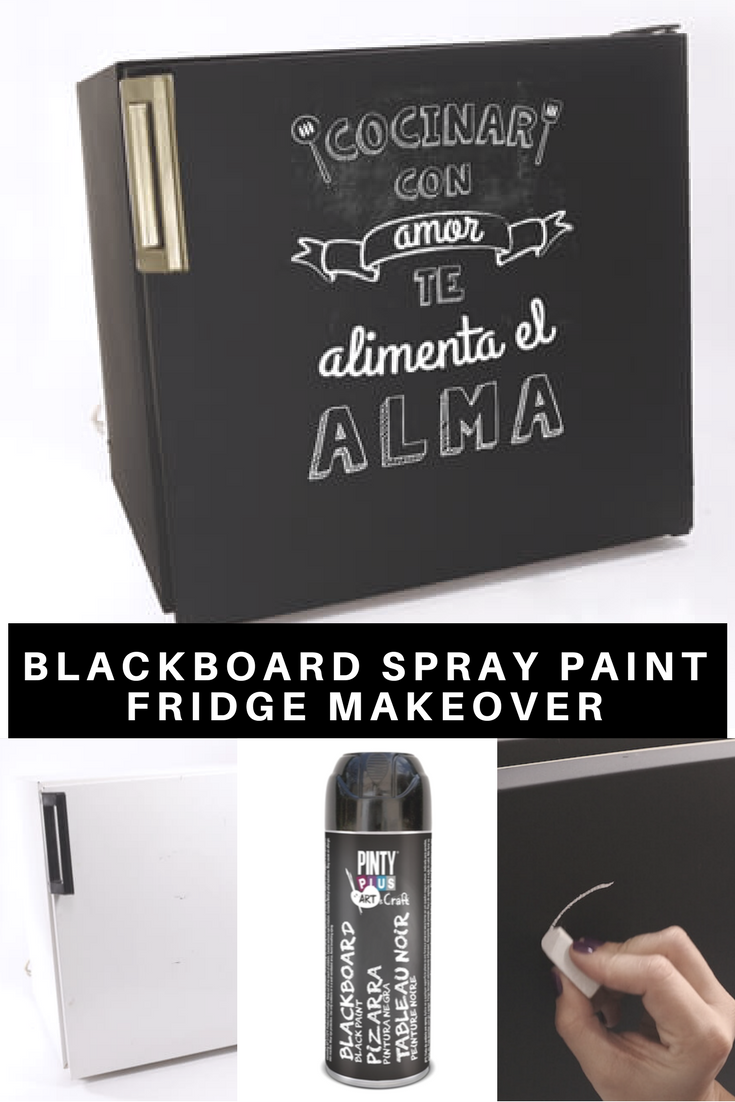
One of our Spanish bloggers had a small fridge that had seen better days. As it still worked ok, they decided to give it a quick makeover using blackboard paint and in addition, they gave it an on trend update by painting the handle with a gold spray paint.
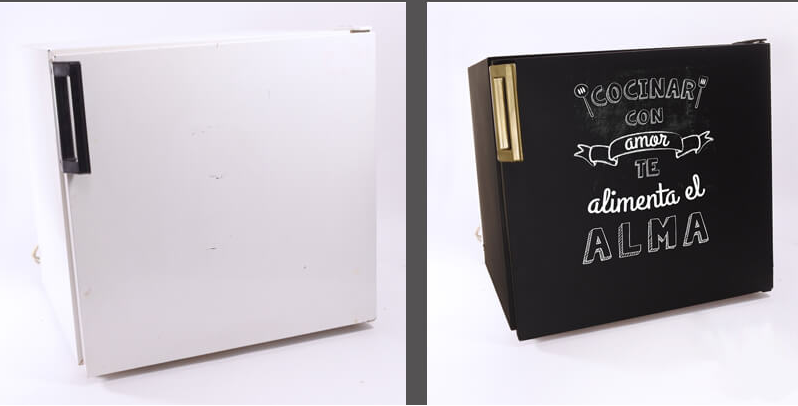
Seeing the “before and after” no one would guess it was the same fridge or how old it was!
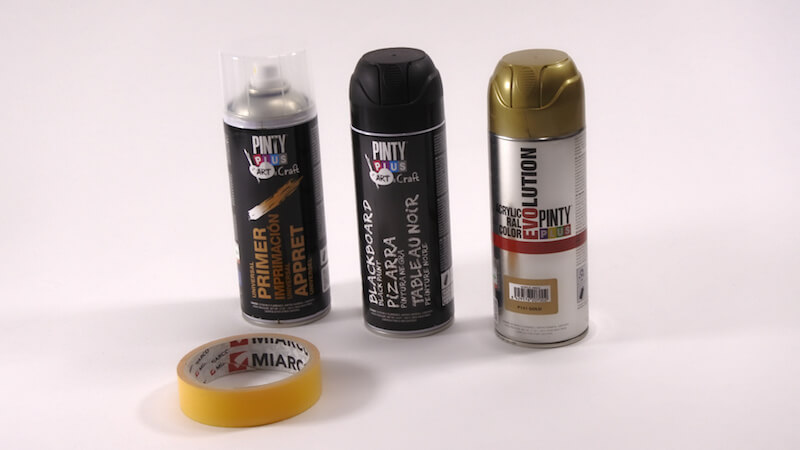
The materials that you will need to give your fridge a makeover are the following:
Pinty Plus Universal spray primer
Pinty Plus blackboard spray
Pintyplus Evolution spray paint in gold
Masking tape
Screwdriver
How to paint a fridge step by step
The following video tutorial shows the whole process to transform your old fridge into a new and updated appliance. (Be reassured, there is no Spanish spoken in the video)
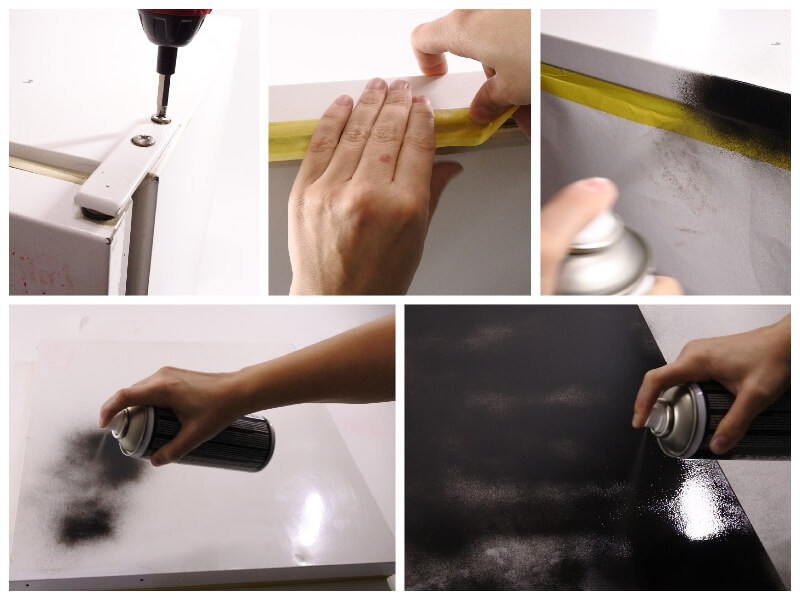
First, dismantle the metal parts. Then clean thoroughly to remove dirt and apply the primer to the handle and the screws, the primer will help prevent corrosion and rusting.
For this project we used a universal spray primer, but other more specific primers can also be used for metals such as the Pintyplus Tech spray primer. When applying the primer, you should shake the can for one minute after you hear the mixing balls and spray at a distance of about 25/30 cm.
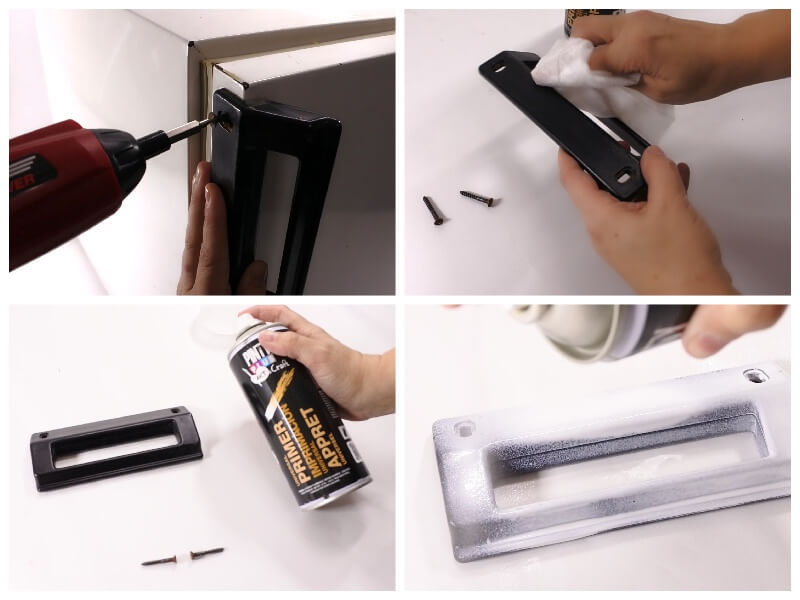
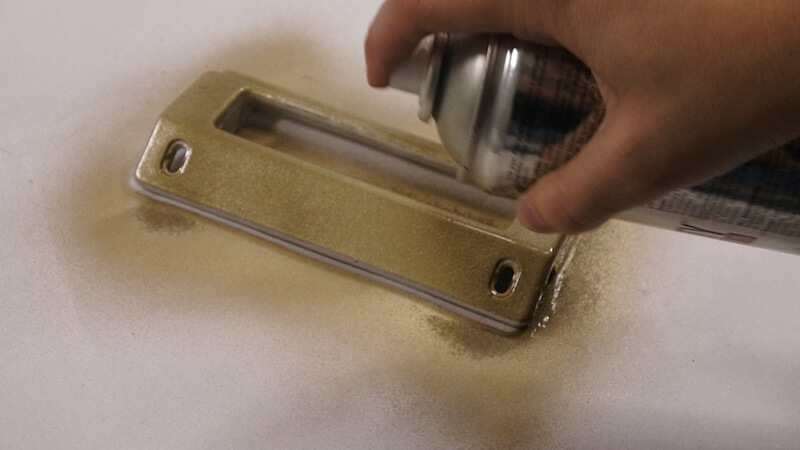
Once the primer has dried (approximately one hour), the handle will be sprayed with gold Pintyplus Evolution.
To make painting the fridge easier, the door is taken off its hinges and the rubber covered with painter’s tape. Next, spray paint on the body and door of the fridge. If you want to obtain a perfect finish, it is advisable to apply thin layers making movements in vertical and horizontal direction until completely covering the surface.
In this way, you will avoid runs or splatters of paint and the paint will be distributed evenly. Blackboard paint has a very good adhesion on wood, cardboard, cloth, etc., but it is recommend to use a primer for plastics or on metals that may be exposed to rust

Finally when the paint has dried, remove the masking tape and screw all the pieces back together. The drying time is usually one hour, but it must be taken into account that it can vary depending on the temperature and humidity.
Finally, wait about 48 hours before writing with chalk on the refrigerator, so the paint will have reached the necessary hardness and the surface is not scratched and can be easily cleaned with a damp cloth
